What Basing Means and Why a Test Batch Pays Off
Basing is the scenery on a miniature's base — the ground, rubble and rock that show where a model is standing. In 40k and other tabletop games, basing ideas often start with three cheap materials: sand for ground texture, cork for rock, and bark for rubble. A material that looks right in a jar can still shed or detach once glued down at 25–32 mm scale.
A test batch settles that cheaply: prepare a few scrap bases, glue one material on each, and judge them at arm's length under the light you paint in. It also shows which pieces belong on a display base and which survive weekly handling.
Prepare Sand, Cork and Bark
Sand. Start with clean craft sand or purpose-made fine ballast when possible; collected or construction sand may contain unknown contaminants. Sieve to remove ultra-fine dust if the texture looks muddy (Battleclash). Use only material that is clean and completely dry before gluing. Do not put unknown collected material in a food oven.
Cork. Cork sheet, floor tile and wine corks all work. Tear cork by hand rather than cutting it so the edges break into irregular rock shapes; Battleclash glues ripped cork pieces down as "rocks". Thick cork counts as heavy, and a beginner's basing guide recommends super glue for weighted pieces because PVA alone is not strong enough (The Mini Primer).
Bark. Bark is the hardest of the three to judge from a jar. Let the test answer the questions that matter: does the piece sit flat, stay attached, and keep its shape once sealed? If it lifts or curls, keep it for a display base.
Cleaning and drying. Organic basing materials can grow mould if they are not cleaned and dried first, so rinse dusty samples and dry them completely (Battleclash).
Reading Particle Scale
Grain size changes the story a base tells. Fine sand reads as packed earth at 28 mm scale, while coarse grit reads as gravel. Judge a sample against the miniature's foot, not the jar: grains that look tiny in a scoop can look like boulders next to a boot.
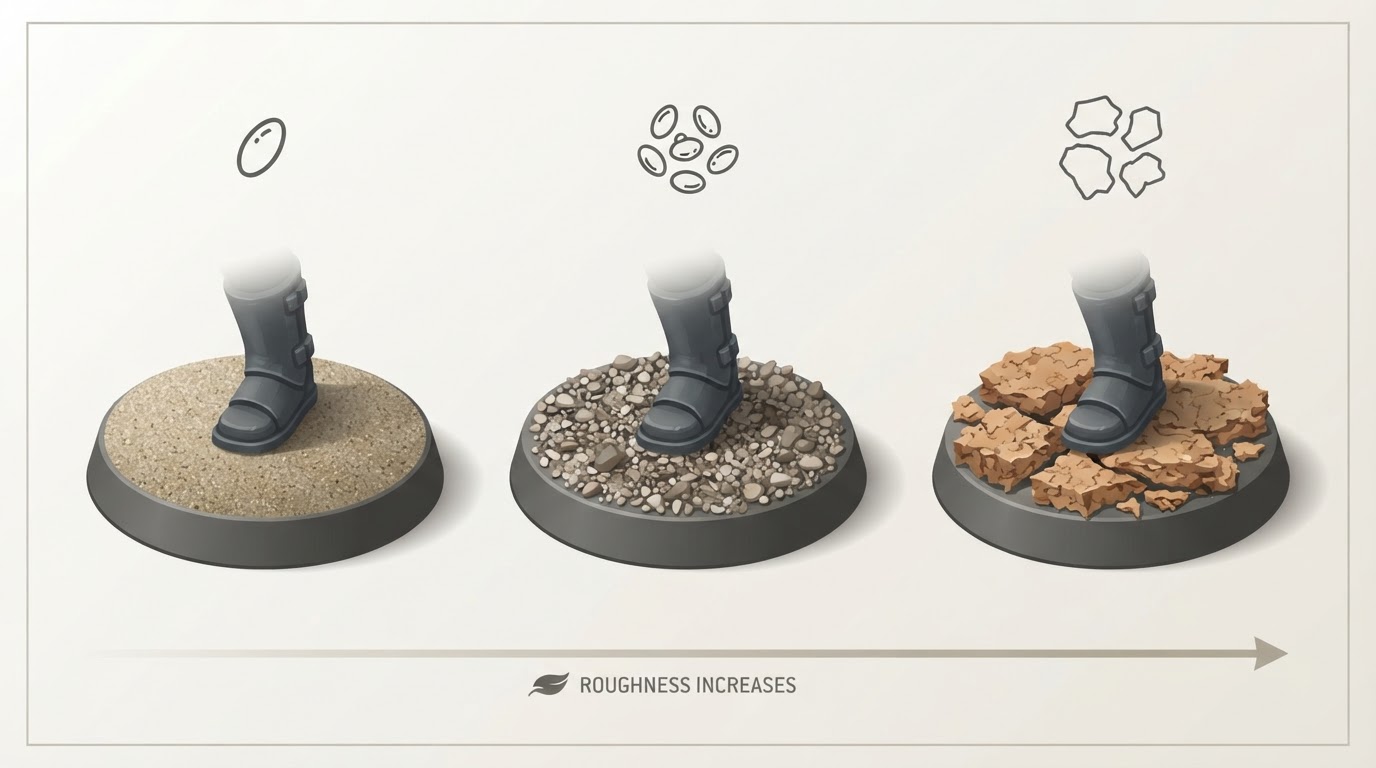
Fine sharp sand and horticultural sand are cheap options, and a beginner's guide cautions against beach sand because its salt can cause adhesion problems and may damage metal miniatures over time (The Mini Primer). Keep the base rim clear if you plan to paint it a clean colour.
Choosing the Adhesive
PVA white glue is the workhorse for sand, grit and flock. An even coat matters more than a thick one: brush it on, press the material in, and let it cure fully. The beginner's guide suggests thinning PVA about three parts glue to one part water, and notes that PVA can look set before it is cured — give it an hour, preferably overnight.
Super glue (cyanoacrylate) is the better choice for cork chunks, rocks and other heavy pieces. Work in a ventilated space: the guide notes that its fumes irritate eyes and lungs.
A second, thinner coat of watered-down PVA over dry sand locks grains in place — the most useful step for keeping loose grit off a painted table (The Mini Primer).
Decision Table for a Test Batch
Material | Reads as | Adhesive | Weak point to watch |
|---|---|---|---|
Fine sand | packed earth, dust | PVA, neat or slightly thinned | uneven glue lets grains shed; add a diluted PVA lock coat |
Coarse grit or ballast | gravel, broken ground | PVA for light grit; super glue for heavy pieces | oversized grains read as boulders at 28 mm |
Torn cork | rock, rubble, broken tile | super glue for chunks; PVA to fill gaps with sand | test that the piece stays flat and attached |
Bark flakes | layered rubble, cliff debris | PVA plus super glue spots for weight | may lift or curl; test before gaming use |
The Test-Batch Workflow
- Label three or four scrap bases with tape so you can tell the samples apart.
- Prepare each material: sieve and dry the sand, tear the cork, rinse and dry the bark.
- Glue heavy pieces first. Super glue cork chunks and any weighted part; let it set.
- Apply PVA to the ground areas, add the sand or grit, press it in gently, then tap the excess onto paper for reuse.
- Cure fully — at least an hour for PVA, overnight if humidity is high.
- Lock the texture with a diluted PVA coat, let it dry, then paint and seal.
Sealing comes after everything on the base is dry, tufts included. Matte varnish reduces the shine of dried PVA and unifies the materials; apply thin coats and read the manufacturer's guidance first. The beginner's guide notes that spray varnish can cloud in high humidity and that cans specify a safe temperature range, so check the label and avoid direct sun.
Completion check: once the final coat dries, tap the base on the bench and tilt it. No loose grains should come away, the cork should not rock, and the seal should look even. If a sample fails, fix the step — more glue, a lock coat, a second thin varnish coat — or mark that material display-only.
Limits to Respect
Three limits belong on the lid of the test box. First, organic materials can mould if they are not cleaned and dried properly. Second, no single recipe covers every glue, varnish and material batch; humidity and product instructions change the result, so your test is the authority. Third, fragile materials suit display pieces more than models handled every game night.
For color schemes and finished-model inspiration after the texture is secure, see our separate miniature painting ideas. This guide is only about choosing and testing basing materials.
FAQ
Do I need to bake sand and natural materials before basing?
No. Use clean, dry materials and avoid heating unknown collected sand or bark in a food oven. If a natural material looks dirty or damp, clean and dry a small sample first; discard it if you cannot prepare it confidently.
Is PVA or super glue better for cork and bark?
PVA handles sand, grit and flock well. Super glue may give a stronger bond for heavier cork chunks, but follow its label and use ventilation. Many bases use both adhesives for different parts.
How do I stop sand from falling off a base?
Apply an even PVA coat, press the sand in while wet, and let it cure fully. Add a diluted PVA top coat, then seal with matte varnish once paint and tufts are dry.


