How to Clean an Airbrush:
The Complete After-Session Routine
Why the Last Five Minutes of Every Session Matter
Your airbrush is a precision instrument with tolerances measured in fractions of a millimeter. A nozzle bore can be as narrow as 0.2 mm — roughly the width of two human hairs — and dried acrylic paint is harder than you think. Skip cleaning once and you'll spend the next session fighting a partial blockage that turns every stroke into a spit-and-spatter session.
The good news: a proper after-session clean takes five to ten minutes, requires no specialized tools you don't already have at your bench, and will keep your airbrush spraying like new for years. This guide walks through every step — the needle, the nozzle, and the paint path — plus what to do when you don't have a dedicated cleaner pot and when a full disassembly is genuinely overdue.
What You Need (and What Works When You Don't Have It)
Airbrush Cleaner
Use the cleaner the paint maker lists for that paint line and the airbrush maker permits. For water-based acrylics that is often a dedicated airbrush cleaner; solvent paints need their matching solvent. Check the labels for concentration and suitability.
Match solvent to paintPaper Towels
Standard paper towels or a lint-free cloth work perfectly.
Essential for wipingSmall Glass or Jar
Used to flush into and, where the manual allows, soak parts. Alternatives: medicine cup or any non-porous container.
For improvised flushesCotton Swabs
Perfect for wiping the cup and reaching tight spots.
Precision cleaningThe After-Session Cleaning Routine: Six Steps in Order
Empty the cup and flush
Dump remaining paint. Add cleaner. If your airbrush manual permits back-flushing, cover the nozzle as it describes and pulse the trigger; if not, flush forward into a jar. Repeat until the flush runs clear.
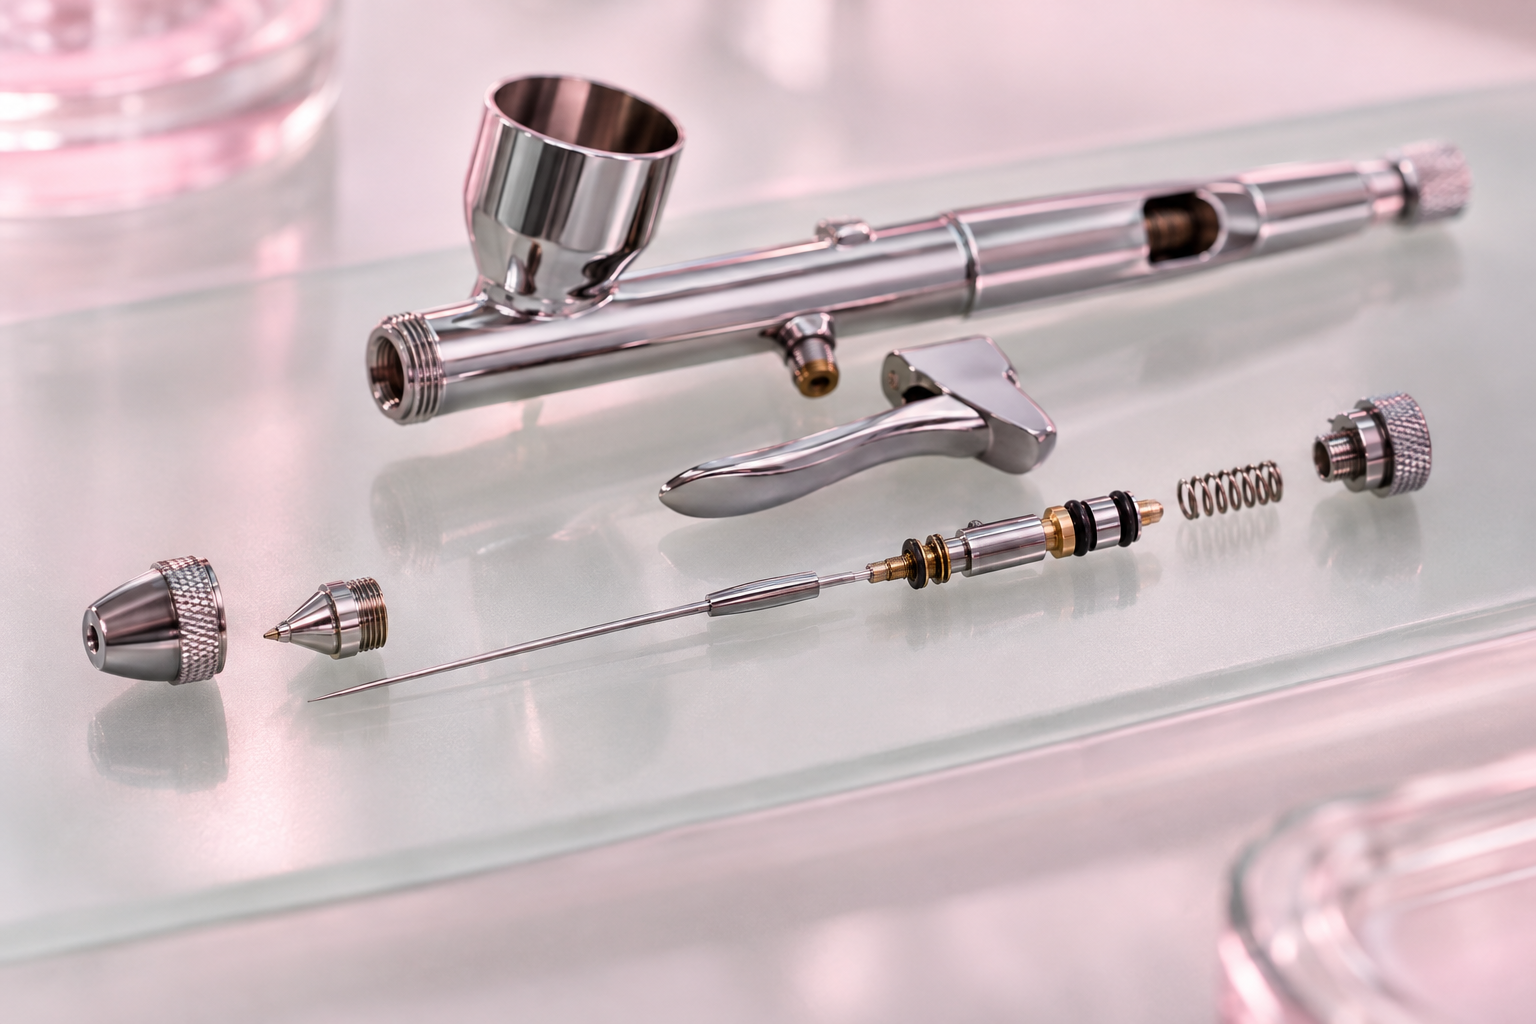
Flush cleaner through the paint path
Fill the cup partway with cleaner and spray into a towel or jar until the spray runs clear. The number of refills depends on the brush and the residue; follow the cleaner label rather than a fixed count.
Remove and clean the needle
Only remove the needle if your manual specifies it. Loosen the chuck and withdraw it as directed; never force a dry needle. Wipe in the direction your maker specifies — Iwata's guide wipes from the back toward the sharp front. If the needle is bent, follow the maker's replacement guidance rather than trying to straighten it.
Clean the nozzle
Remove the nozzle only if your manual allows it; some makers use compression-fit nozzles with different removal steps. If the maker permits soaking that part, follow its stated cleaner and time — Iwata limits its specified part soak to ten minutes and does not recommend soaking the whole airbrush. Use a soft nozzle brush; never ream the bore with metal.
Wipe the cup and body
Use a dampened cotton swab to wipe the gravity-feed cup and the paint channel at the bottom.
Reassemble and test spray
Lubrication is optional and product-specific; Iwata's guide does not call for routine lubrication. If your manual specifies a compatible lubricant and where to apply it, follow that; otherwise reassemble clean and test with water.
How to Clean Without a Dedicated Pot
Paper Towel Method
Back-flush into a folded towel and spray forward onto a flat section. Dispose of immediately.
Glass Jar Method
Use any small food jar or medicine cup. Add enough cleaner to cover the parts you are cleaning, and follow the manual's limits.
Paint-Pot Lid Method
The concave lid of an empty acrylic paint pot is a convenient depth for a small part, if the manual permits soaking it.
Which Cleaner to Use — and What Governs the Soak
| Paint Family | What to Use | What Governs the Limit |
|---|---|---|
| Water-based Acrylics | A dedicated airbrush cleaner, or the thinner/cleaner the paint maker lists | Paint label and airbrush manual |
| Water-based Primers | The cleaner named for that primer line | Paint label and airbrush manual |
| Enamel Paints | The matching enamel thinner or cleaner named on the label | Paint label and airbrush manual |
| Lacquer Paints | Lacquer thinner only if the airbrush maker permits it for those parts | Paint label and airbrush manual |
| Solvent Primers | The matching thinner named on the label | Paint label and airbrush manual |
There is no universal soak time or solvent concentration. Iwata's ten-minute limit applies to its specified parts under its own instructions; other makers set their own limits, and some parts should not be soaked at all. Fresh paint usually clears with a flush; dried residue may need more time or repeated cleaning.
Six Mistakes That Permanently Damage an Airbrush
- Reaming the nozzle with metal: Anything harder than a brush bristle will scratch the bore and ruin your spray pattern.
- Over-tightening the nozzle: Metal-on-metal threads only need to be finger-tight. Over-tightening strips threads.
- Pulling a dry needle: If paint is dried on the shank, withdrawing it can score the channel. Follow the manual; if it permits soaking the relevant part, do that first.
- Using acetone on rubber seals: Acetone can damage many O-rings and seals; use it only if the airbrush maker explicitly approves it.
- Letting lacquer dry overnight: Dried lacquer bonds to metal nearly as hard as varnish, making it extremely difficult to remove.
- Spraying dry: Flush with liquid rather than air alone; many makers advise against running the brush dry during cleaning.
More on Airbrushing and Miniature Painting
Airbrush Cleaning — Common Questions
Q: How often should I clean my airbrush?
A: Clean at the end of every session and flush between colors. If the brush sits for a while mid-session, flush before paint dries; the right interval depends on your paint and environment.
Q: Can I clean my airbrush with just water?
A: Water can help with fresh water-based acrylic, but dried residue usually needs a cleaner suited to the paint. Check the paint label and airbrush manual rather than relying on water alone.
Q: What is back-flushing?
A: Covering the nozzle and pulsing the trigger to force fluid back into the cup, where the airbrush manual permits it, loosening collected paint.
Ready for your next masterpiece?
Explore more guides, reviews, and professional tips from the workbench.
Back to Home