What the guide says
Page 3 of Games Workshop’s guide notes that the thinner parts of a model may become bent or twisted slightly, often because of heat from the reaction of the resin curing. The correction it describes is controlled warming followed by gentle repositioning. The amount of heat depends on thickness, with thicker parts needing to be heated for longer.
That is the whole specification. There is no temperature, no time in seconds and no heat-source setting in the guide. A figure borrowed from another kit cannot account for the thickness of the part in your hand, which is why the guide's relative rule — thicker parts take longer — is the only dose guidance to work from.
Before you heat anything
Confirm first that the part belongs to a cast-resin kit the guide covers. A photopolymer part from a resin printer is a different material with a different process: it is washed and then post-cured under UV, and warming it is not a substitute for either step. For the separate question of exposure time, see our guide to how long to cure resin miniatures.
Prefer a loose, unassembled part. The guide describes heating a piece, and a loose piece is easier to hold, watch and support than one already glued into an assembly. If the part is fixed in a mixed assembly — resin joined to plastic, or detail you cannot separate without cutting — this is not the situation the guide describes; ask the kit's maker rather than run heat around glue joints and other materials.
Look for damage that warming will not fix. A bend or twist is what this method addresses. A crack, a missing chunk or a crushed edge is lost material rather than a shape problem, and heat can make it worse. For a casting problem, the guide's advice is to contact its Customer Service Team, keeping the batch code from the packaging and a photo of the problem.
Set up before anything gets hot: a stable surface, somewhere the part can rest without pressure on a thin tip, water kept away from sockets and electrical tools, and the cord of a hot-air gun clear of the water and your work.
A cautious warm-water path
Use a container deep enough to cover the bent section and fill it with hot water. Treat the water as hot enough to soften the resin and hot enough to scald: lift the part with tongs or a slotted tool rather than your fingers, and keep your face back from the steam. Rest the part on a broad area so the thin end you are correcting is not bearing its weight.
Check it every so often instead of leaving it in for a set period. A part that yields gently to a light twist is ready; one that has gone limp has taken more heat than it needed.
If the piece returns to its original shape on its own, let it. If not, twist it gently back into position. Support fine detail — a muzzle, a blade edge, a banner pole, a thin run of cabling — from a thicker section with tongs or a soft pad. Do not hold a softened, hot detail with a bare finger. Move the part a little, check, and stop if a gentle twist meets resistance that would need force.
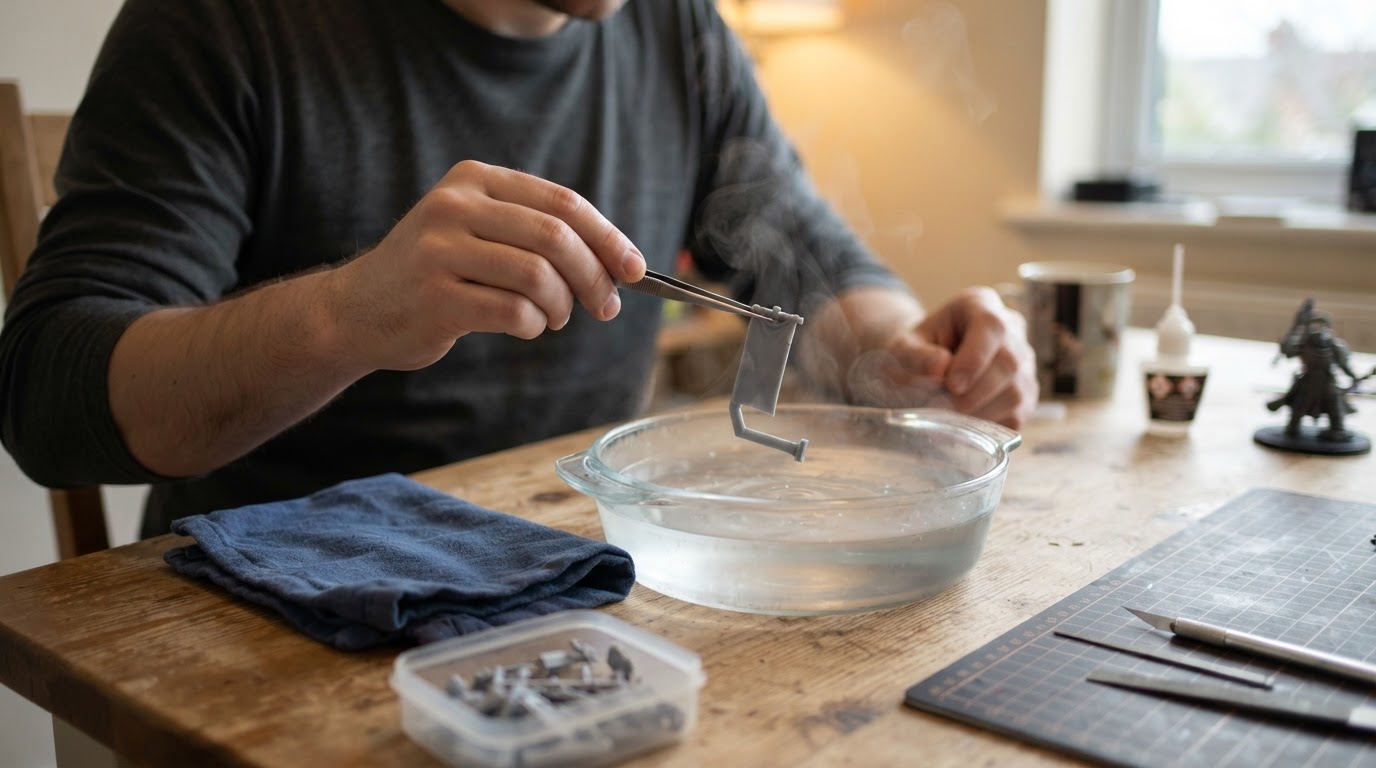
Hold the corrected position while the part cools. Keeping it there is a reasonable practical inference from how the method works, not a cure schedule, and it does not guarantee the part will stay straight. Let it cool until it is comfortable to handle before you test it or refit it.
Once it is fully cool, dry-fit it, as the guide advises before assembly generally. The part should sit in place without force, its mating surfaces should meet as the kit expects, and the fine detail should still be intact. Sight along it from a couple of angles; a bend that looks fixed head-on can still show in profile. Once it fits, finish the assembly as the kit intends; this method changes the shape, not how the part should be glued, pinned or painted.
The hot-air alternative
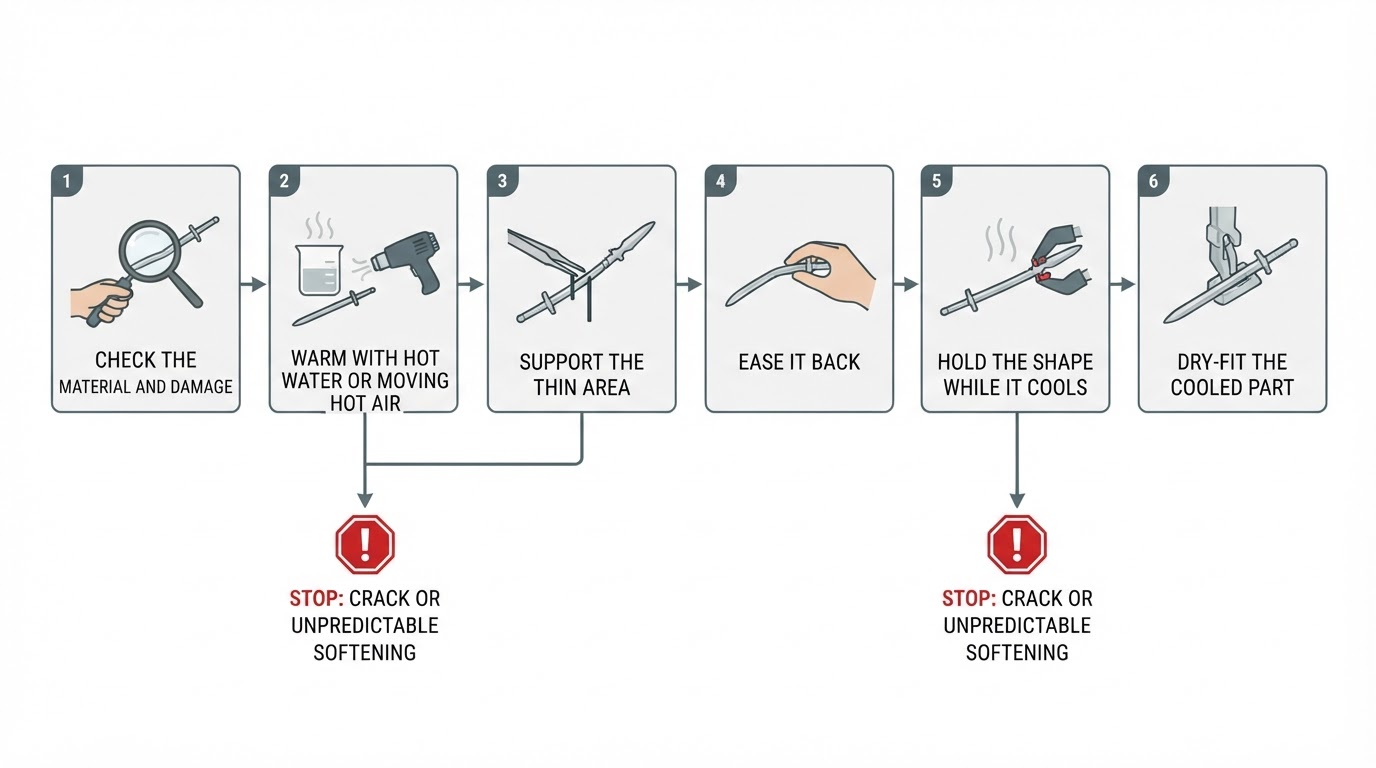
The guide also allows a hot-air gun or a hair dryer instead of water, which keeps the part dry. It gives no setting, distance or time for either tool, and nothing about how a particular gun will behave on an unfamiliar part. Treat the alternative as the guide presents it — an option for careful warming — rather than as license to improvise a procedure. If you cannot judge how much heat the part is taking, stop and ask the kit maker.
When to stop
Stop and contact the kit maker's Customer Service Team if the part cracks, if the surface softens in a way you cannot control, if moving it would need force, or if the material and the extent of the distortion are unknown. The guide does not prescribe a retry schedule, and repeating the same step does not identify why the corrected shape did not hold. If the part returns to its old shape after cooling, the guide's next step for a specific kit is the maker, not a longer application.


