What the Snow Base Is Made Of
The recipe comes from one working example: Thor's Creative Twilight snow base tutorial uses Woodland Scenics Snow Flake as the flock, matte Mod Podge as the binder (a PVA glue that also seals), a few drops of white paint, and the same dry flock again for the final dip. Treat it as one painter's combination rather than a compatibility guarantee. PVA glues and snow products differ, so try an unfamiliar pair on a spare base before you commit a model.
Two choices shape the result. White paint keeps the dried snow a vibrant white; without it the glue dries mostly transparent and reads wet rather than cold. The binder's finish does the same job: matte Mod Podge suits a fluffy look, while a satin or gloss version pushes the same mixture toward wet, icy snow. Neither finish is wrong, so decide which look you want before you open the jar.
Snow sits on top of the ground rather than replacing it, so start from a finished surface: prime and paint the base, then let that work cure before mixing paste. If you are still choosing or gluing the sand, cork, or bark underneath, the DIY basing materials test-batch guide covers particle scale, adhesives, and sealing; a scrap-base test there is the same habit worth using for an unfamiliar snow mix.
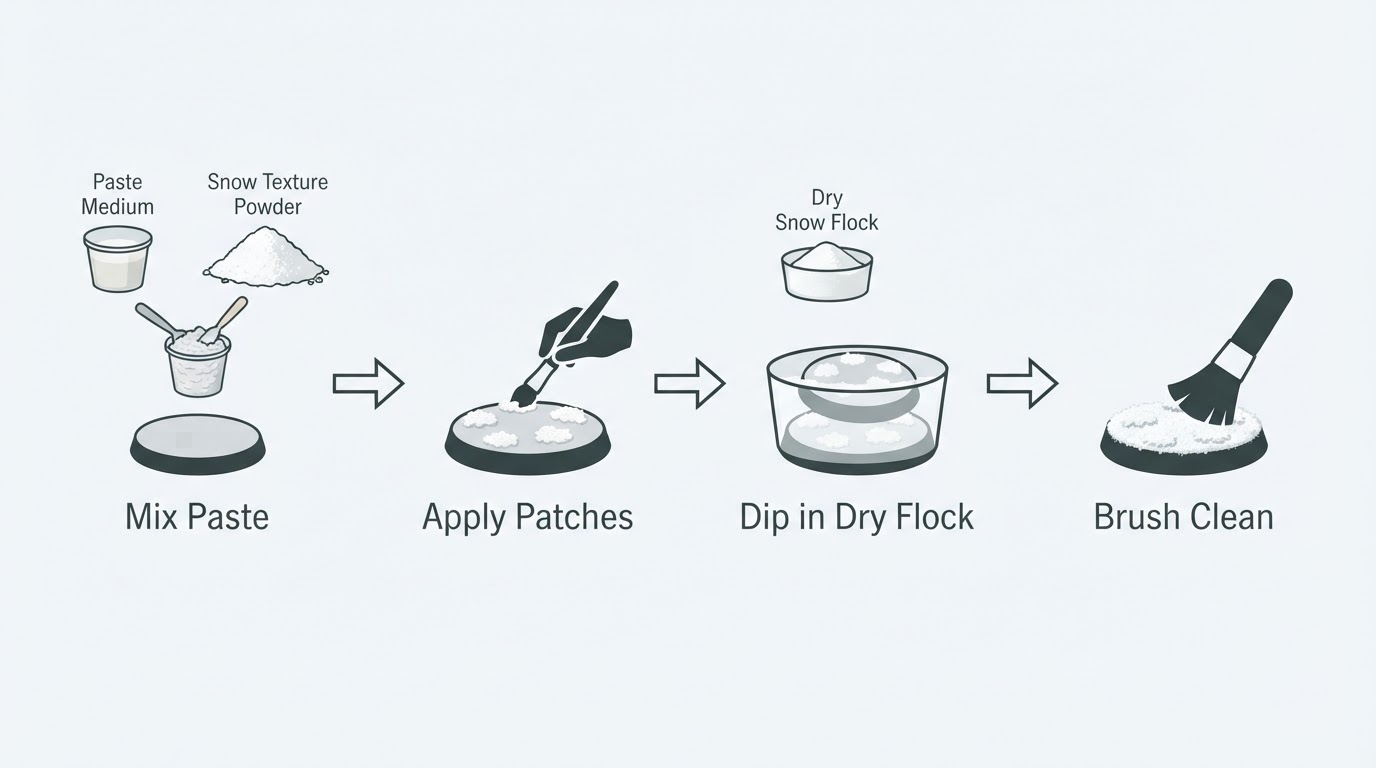
Mix the Paste, Then Brush It Into Patches
Add PVA to a cup, stir in the white paint, then add flock and mix until there are no dry pockets or puddles of loose glue. The tutorial's order is glue first, paint second, flock last, but thorough mixing matters more than the sequence: the goal is a spreadable paste. Consistency is the control. A thicker mix piles into drifts, while a thinner one brushes out into dusted edges; Thor mixes his thinner than strictly necessary so he can spread light, uneven coverage; start thicker and loosen it with a little more glue if the brush drags.
Load a brush and place the paste in patches rather than a sheet. Random placement, varied patch size, and edges that thin to almost nothing are what make the result read as weather rather than icing. Covering the entire base is allowed, but leaving some painted ground visible is what keeps the mix of textures the tutorial is after.
Before the paste goes down, dry-fit the model and note where its feet, tab, slot, or magnet recess land. Snow under a contact surface can lift a model, tip it, or stop it seating, and cleaning cured glue out of a recess is tedious. Some painters bury feet deliberately for a snowbound look, and that is a valid choice rather than a failed base; protect only the attachment surfaces you actually need, and keep the rim clear if you want a crisp edge.
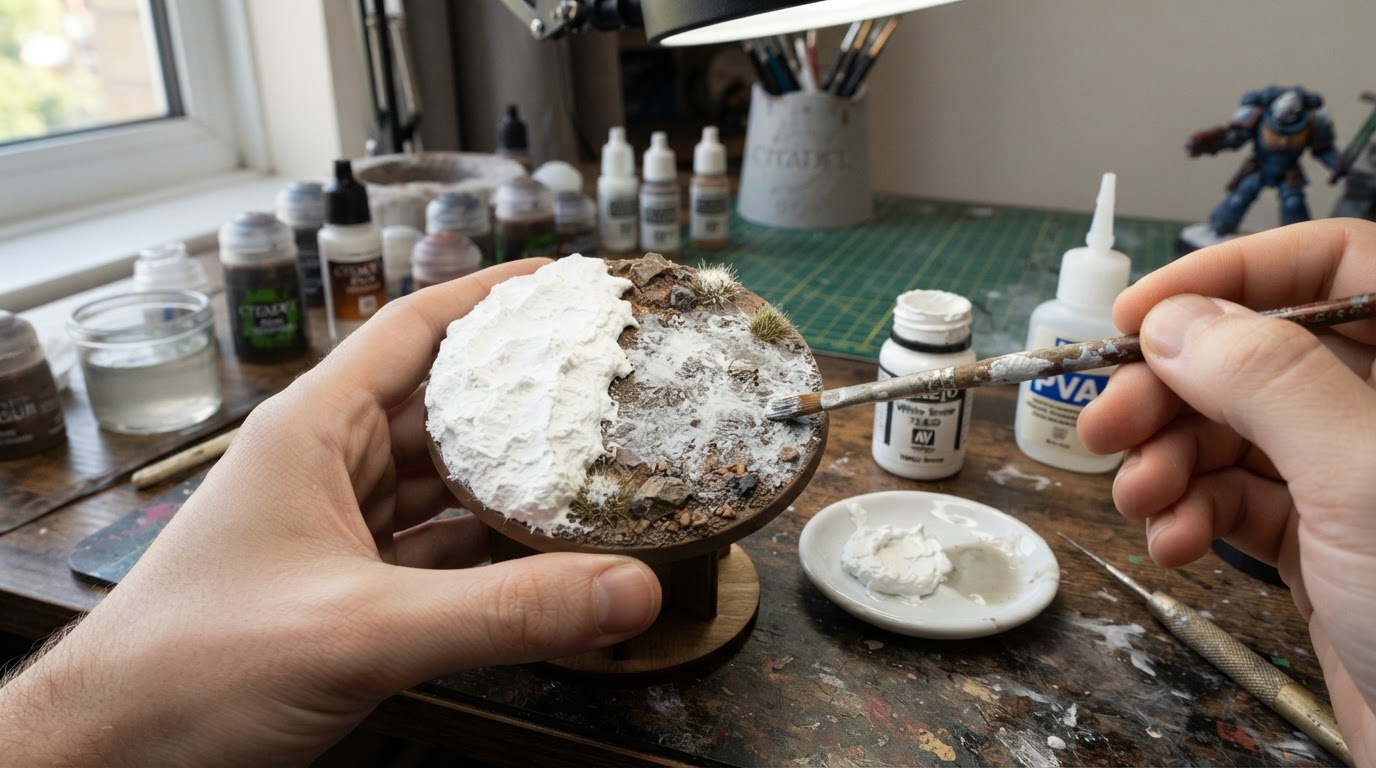
Thin patches let moulded ground texture and painted debris show through, which is usually what a small snow effect on a finished base needs. Build height only where the scene calls for it, such as a drift against a rock, and keep the rest low.
Dip the Wet Surface in Dry Flock
While the paste is still wet, dip the base into a container of dry flock. Dry material sticks to the top surface only, giving the patch a granular, matte crust instead of a slick skin. This is also the step you can skip: Thor notes that stopping before the dip leaves a wetter look that some painters prefer, especially for ice or slush. For fluffy snow, dip.
Thor transfers his flock into a bag for exactly this reason. Dipping covers the patch evenly and lets the excess fall back into the container, which is tidier than pouring dry flock over the model and trying to recover what lands on the desk. A shallow tray works too, as long as the base can be pressed into it without knocking the model.
For taller drifts, build in layers. Apply a patch, let it set, add another on top, and dip again. Each pass adds height without the paste slumping, and the stacked surfaces catch dry flock at slightly different angles, which reads as depth.
Then leave the base alone while the binder dries. Thor waits a handful of hours before cleaning, which is a useful indication of how long a thick patch stays workable; the product's own instructions remain the authority for your glue. Thin patches set faster than piled ones, and a humid room slows both.
When the Finish Looks Wet or Sheds
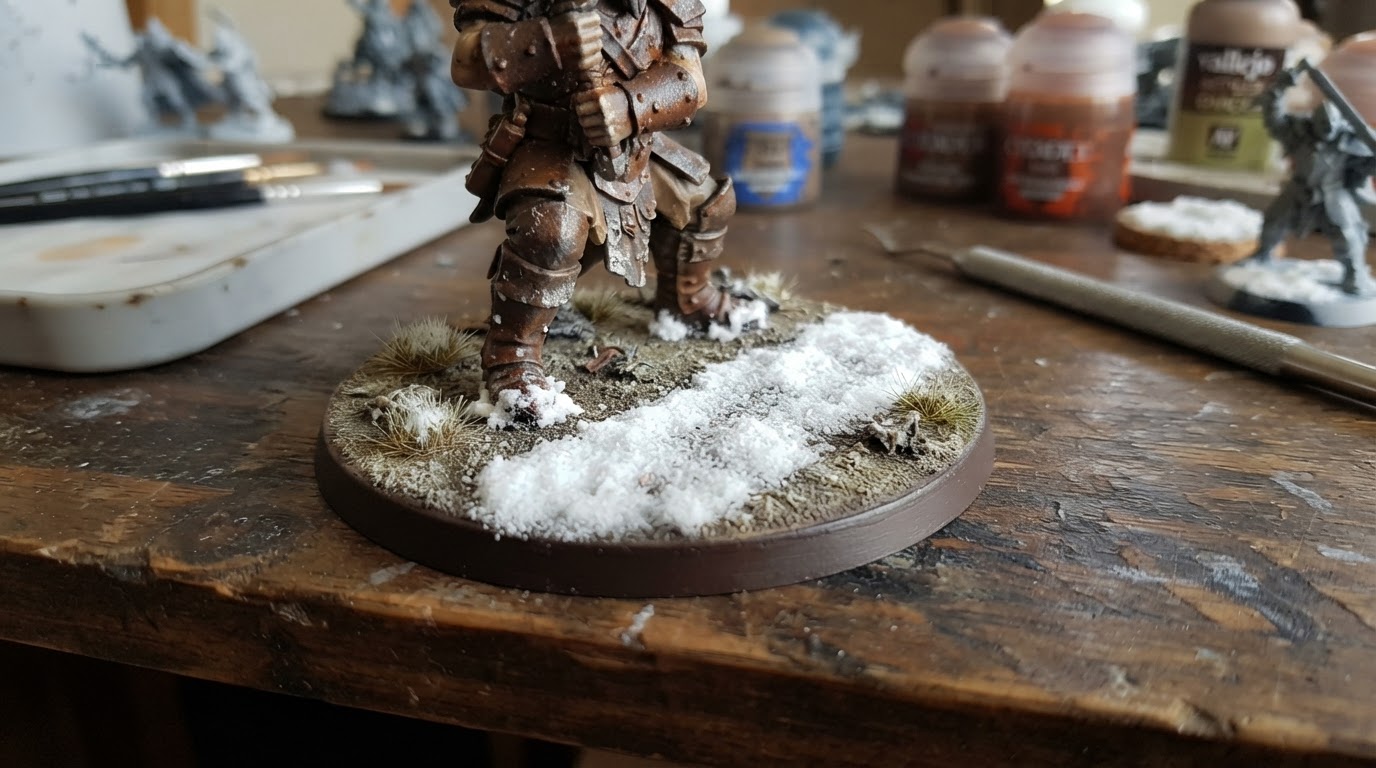
The matte, granular finish described above is the goal of this fluffy-snow method, not a rule for every snowy base. Glossy ice, slush, and wet snow are deliberate looks, and a glossy surface can be exactly what a painter wanted.
If a patch dries shinier than you intended, several things can contribute: too much binder relative to flock, no white paint in the mix, a satin or gloss binder, or a thick application that stayed wet longer. While the patch is still wet, press more dry flock into the surface. Once it has set, Thor's layering approach — a thin second paste patch over the dull area, dipped again — can cover the old sheen, but it is not a guaranteed repair. A dry topcoat may reduce shine; it will not necessarily fix every glossy patch.
Loose material after cleaning has similarly varied causes. It may be excess dry flock the first brush missed, a patch that received too little binder, or a glue and flock combination that has not cured as expected. Brush and tap first. If a patch keeps shedding, compare it with a spare test patch made from the same mix before adding more binder or varnish.
Clean Up Without Filling the Air
Clean the base after the binder has set, not while it is tacky; brushing a wet patch smears material rather than removing it. Thor blows off the excess and then works a large brush along the model and the base rim. Indoors, swap the blowing for brushing and tapping — fine flock dust hangs in the air, settles on wet paint, and is unpleasant to breathe.
Tap the base upside down over a shallow container so loose flock falls back in for the next model. Brush from the centre of a patch outward so you lift strays rather than dragging them across the snow, and check the legs and rim, where a single flake shows against bare paint.
A finished base usually needs only a quick check: the rim is as clean as you wanted, the model seats where you need it or its feet are deliberately buried, painted ground still shows between patches where intended, this fluffy method reads matte and granular rather than glossy, and a tap over a tray yields little more than the odd stray flake. If any of those looks off, compare it against a spare patch made with the same mix before changing the recipe.
The Same Method at 40k Scale
Nothing about the recipe changes for Warhammer 40k models. What changes is room: a large monster or dreadnought base can carry several patches, a drift, and a clear rim, while a 25 mm infantry base may fit one irregular patch and a dusting. Because the snow sits in patches over finished ground, the eye reads it as a layer on terrain rather than a replacement for it, which is what keeps a winter base looking like ground instead of frosting.


