Bore the barrel during model prep
Drill before primer. A slip on bare plastic can be sanded back or filled with a dab of putty; the same slip after paint means repainting the weapon, the hand wrapped around it, and sometimes the armor behind it. FauxHammer's tutorial on drilling gun barrels puts the job in the prep stage for the same reason.
Mark the center by eye, then check it twice
FauxHammer's walkthrough does not use a centering jig. He marks the muzzle with a semi-permanent pen, which lets you rub out a dot you do not like instead of committing it to the plastic. The mark is a judgment call, and it is worth taking seriously because the first cut is difficult to undo.
Sight the muzzle from straight ahead, then from above, then from the side. A dot that looks central from one angle can sit high or low from another, and on an oval or slotted muzzle the middle is not always where the widest point suggests.
Start with a dimple, not a hole
The muzzle face on most sculpted weapons is a shallow dome or a flat with a molded recess, and a bit started on that curve skates before it bites. Press an awl, or the point of a drawing pin, into the pen mark to form a shallow seat for the bit.
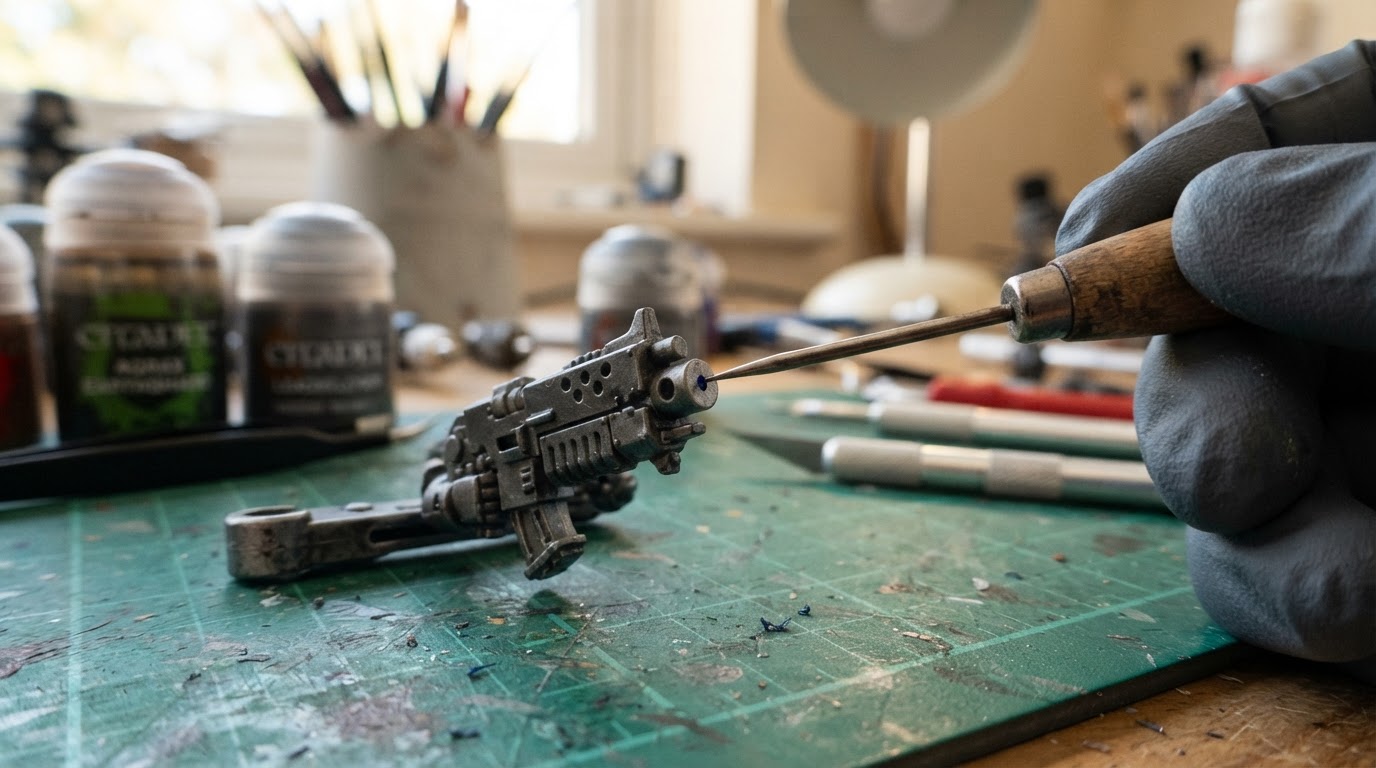
A hobby knife point can do the same job, but FauxHammer notes that the tip can blunt or snap, which is a poor trade for one dimple. Keep the dimple shallow. It only has to hold the bit for the first turn or two, and a deep cone changes the shape of the opening before you have drilled anything.
Choose the bit from this muzzle, not from a rule
FauxHammer would rather not give one bit size, and says so: the right diameter changes with the weapon and the scale of the models carrying it. A size that suits one faction's rifle may be too large or too small on another sculpt, so start by looking at the muzzle in front of you.
For a side vent or a muzzle brake, FauxHammer uses a bit slightly smaller than the molded recess. The recess has a slight roundness from the mold, and a hole that cuts that curve away leaves a hard 90-degree lip that catches light and paint differently from the rest of the muzzle. For the main bore, the opening should still sit inside the rim, with a visible ring of material around it.
The neck behind the muzzle sets the upper limit. A bit wider than that neck can break out through the back of the barrel instead of staying inside it. Test the shank in the pin vise collet before you need the hole: the collets hold fixed ranges, and finding the mismatch halfway through a bore is worse than checking first.
Plan the depth against the actual wall
Depth decides whether the rim survives, and there is no useful universal number. What matters is how far the muzzle projects, how much material sits between the face and the neck, and how the inside will read once primer and wash darken it.
Mark the bit with a strip of tape at the depth you want, then lay it against the outside of the barrel to see where the tape sits relative to the far wall. If the line would pass through the opposite side, shorten the target or move the hole. The pinning guide uses the same tape check for joint depth, for the same reason: a bit that punches through the far side leaves a weaker part than it found.
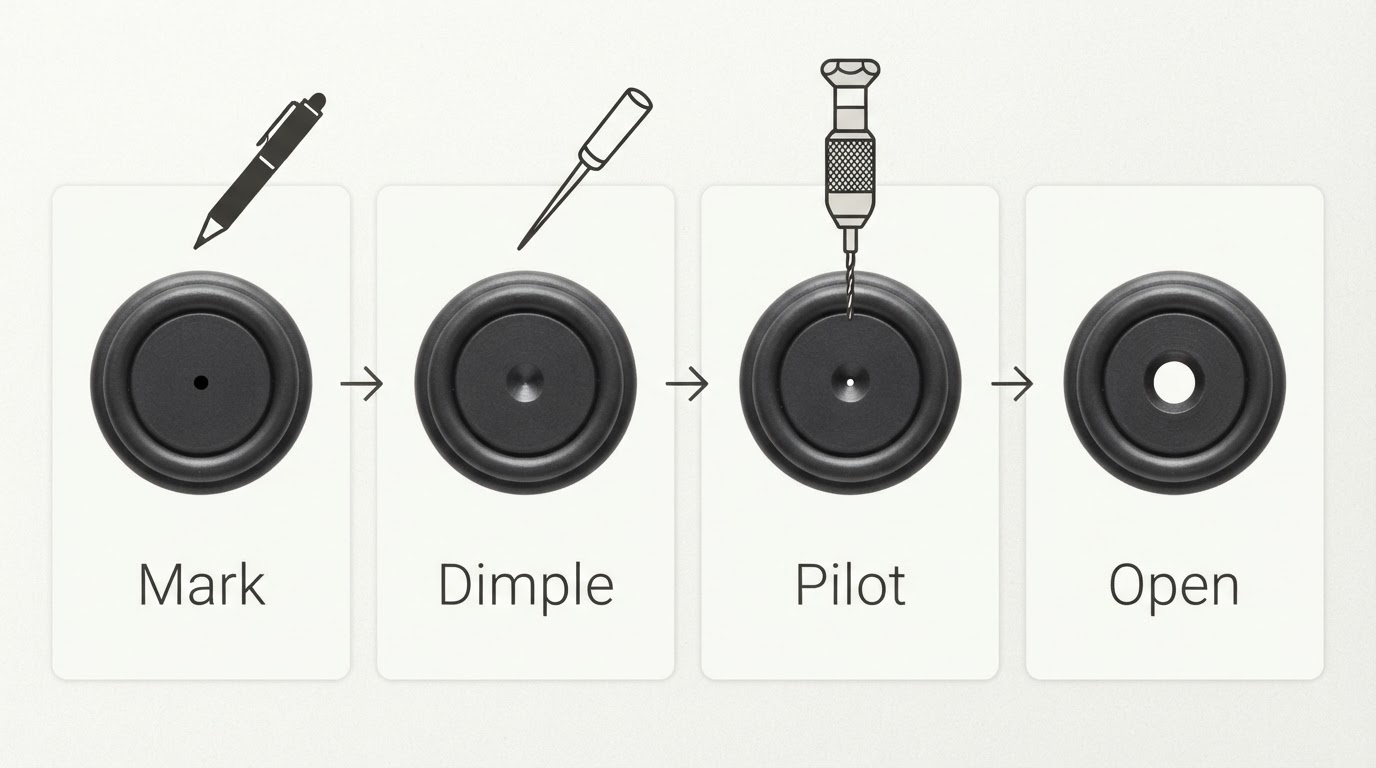
A shallow opening that keeps the rim intact reads as a bore once paint settles into it. Going deeper buys very little extra visible depth and costs the material behind the muzzle.
Turn the pin vise and let it cut
Seat the bit with two or three reverse turns, counter-clockwise on a standard right-hand bit, so the tip draws into the dimple instead of skidding across the muzzle. Then turn clockwise. FauxHammer's instruction is to apply only enough pressure to keep the drill married to the part and let the flutes lift the material. Pushing adds heat, burrs, and the chance of a snapped bit inside a hole you cannot reach.
A pin vise turns slowly by design, and that is the feature rather than a compromise: you can read the angle before the bit is buried. A power drill offers no advantage on a part this small. Secure the part so it cannot roll, keep your fingers out of the bit's path, and wear eye protection. Clear the swarf every few turns with a toothpick or an old brush so the flutes cut plastic rather than compacted dust.
Work side vents from both sides
Where a sculpt has side vents, FauxHammer works each one from its own side: a little from one, then a little from the other, until the openings meet. Drilling all the way through from one side usually exits somewhere other than the intended point, and going at it from both sides costs only seconds.
This applies only to sculpts that have those vents, whether a muzzle brake, a shroud, or a row of cooling holes. A plain muzzle needs the bore and nothing else; inventing vents on a smooth barrel adds holes the sculpt never had.
When the barrel should stay closed
Some barrels are better left alone. A wall thin enough that the hole breaks through the side leaves the muzzle weaker than it started. A hollow or rotocast resin shell can let a bit that feels like it is cutting punch into empty space and split the surface, and looking at the muzzle face, or even filing across it, only tells you about the surface you can see. If the smallest bit you own is already wider than the neck, the hole will break out behind the muzzle, and care at the front will not prevent it.
For a part that cannot take a hole, painting the muzzle dark is a reasonable fallback. A small dark circle or ellipse where the bore would be keeps the weapon intact and gives the eye something to read at tabletop distance. It is a compromise, not a substitute for a hole the sculpt can safely take.
Check the hole before primer
Look at the muzzle from straight on, from above, and from the side. The opening should read central from each view; a hole that looks right from one angle and crooked from another is the failure this sequence exists to prevent. The molded rim should be unbroken all the way around, with its roundness still there.
White stress marks around the lip mean the bit was forced or the hole is too tight. Swarf left inside the bore shows up as a pale fleck once the model is painted, so clear loose material with a toothpick or an old brush and leave the rim alone. If a vent has a burr, a brief return to the smaller side bit tidies it without changing the shape of the opening.
Muzzle detail and structural pinning are separate jobs
A bore changes how the weapon reads. Pinning does a different job: it puts a rod through a joint that carries leverage, so the adhesive has a mechanical core instead of sitting on two flat faces. In the pinning guide the checks are rod-to-bit matching, depth measured separately on each half of the joint, and a dry fit before any adhesive goes in.
The two jobs remove material for different reasons, and the muzzle is not automatically safe because it is only cosmetic. A thin wall can still be weakened by an oversized hole. When both jobs are on the same model, do the structural work first while the part is still square and easy to hold, then come back to the muzzle for the detail.


