What to do first when a print is stuck to the FEP
A failed print can leave cured layers on the release film. Possible causes include plate adhesion, exposure, supports, resin temperature, film condition and model geometry; the stuck layer alone does not prove which one is responsible.
Stop there. Do not start the next print on top of the debris, and never attack the film with a razor, knife, or metal scraper. Elegoo's after-failure guide tells owners to use the supplied plastic scraper and warns against sharp tools; Formlabs tank documentation repeats the rule, because metal can damage the film and cause a resin spill. Wear nitrile gloves and eye protection, and wash skin contact with soap and water.
Remove the failed print the way the maker designed
Use the tank-clean cycle when the whole vat is fouled
If your model has a tank-clean or cleaning-sheet function, follow its manual. It cures a sheet that can lift small debris and failed layers together. Formlabs describes this process for Form 4 tanks, but its timing and holders are specific to that machine and material; do not copy those settings to another printer.
Peel by hand only with plastic and minimal force
For a localized blob, follow your vat maker's removal steps. When the manual permits a plastic scraper, use minimal force from the edge; do not gouge or bend the film. If it resists, stop and check the tank-clean procedure rather than pushing hard against the underside. Filter or transfer resin only as your printer and resin maker instruct.
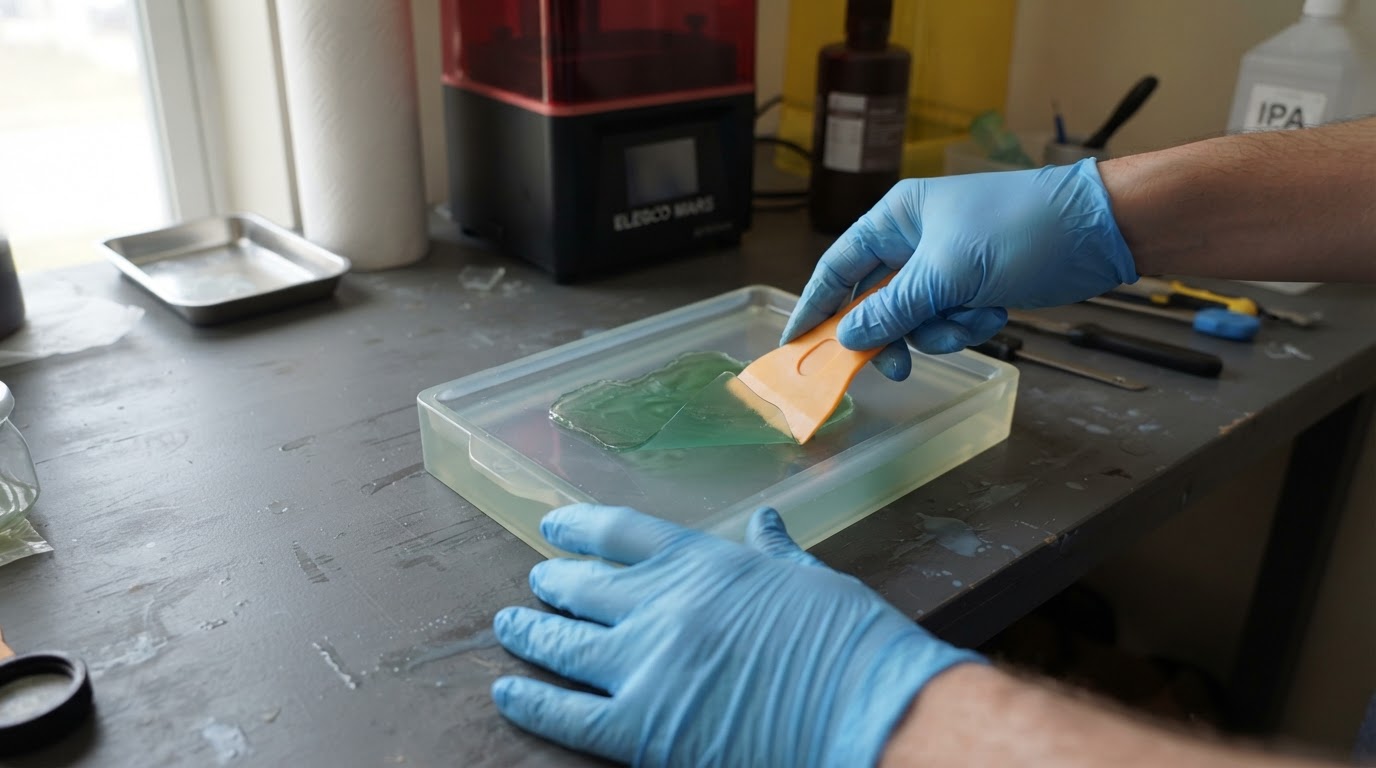
Clean the film without scratching it
Cleaning methods differ by tank design. Formlabs' Form 4 guide permits a little clean IPA on a lint-free cloth for its film, while its Form 3L guide explicitly warns not to solvent-clean the inner film. Follow your exact printer's manual; avoid abrasive towels and never trap liquid resin between film layers.
Decision table: match the symptom to the safe action
What you see | Likely cause | Safe action |
|---|---|---|
Plate empty, cured sheet on the film | Exposure, temperature or plate adhesion may be involved | Clear the vat, then check plate preparation and the maker's exposure guidance |
Grit and flakes in the vat | Cured debris from the failed print | Tank-clean, then filter the resin |
Cloudy print zone, banding, ghost outlines | Worn film losing clarity | Replace the film with the maker-specified type |
Scratch, dent, puncture, or resin under the vat | Damaged film | Stop, replace the film, check the screen for leaks |
Print will not stick to the build plate | Plate adhesion or leveling, the opposite failure | Clean and level the plate; not a film-removal job |
Inspect the film before you reprint
Elegoo's rule of thumb: small, light marks do not affect printing, but once wear affects results and success rate, replace the film. Formlabs adds that scratches and debris cause defects, and resin can cure inside large flaws and trigger more failures.
Retire the film when you find a cloudy zone that wiping will not clear; scratches you can feel with a gloved fingernail; ghost-white outlines of earlier prints; a dull tap instead of a crisp drum sound; or pinholes, punctures, or resin between film layers. Tanks are consumables: keep a spare and follow the maker's guide.
FEP, PFA, nFEP, and ACF: know your film
These release films are not interchangeable by default. FEP is the classic material; PFA, often sold as nFEP, and ACF appear on newer machines, and makers design exposure and lift settings around a specific film. Elegoo publishes model-specific replacement guides for its Mars and Saturn lines, and Formlabs treats each tank generation as its own consumable. Use the type your printer manual specifies.
PPE, waste resin, and disposal done properly
- Wear nitrile gloves and eye protection whenever the vat is open, and wash skin contact with soap and water.
- Never pour liquid resin down the drain or into household waste; follow the Safety Data Sheet and local rules instead.
- Handle used wipes, cleaning sheets and other contaminated solids according to the resin maker's SDS and local waste rules. Do not assume a tacky sheet is fully cured; do not squeeze liquid resin from it by hand.
- If the manufacturer permits resin reuse, filter it with the maker-recommended method into a compatible opaque container. Do not return debris-contaminated liquid to an original cartridge.
Filter, clean, and retest
- Drain the vat through a fine filter into an opaque container.
- Remove the print and debris with a tank-clean cycle or a plastic scraper.
- Clean and inspect the film using the exact vat maker's approved method.
- Clean and re-level the build plate, checking even corner resistance.
- Let resin reach the temperature range on its label; cold resin raises peel force.
- If the same model fails again, review the maker's exposure guidance and model supports, changing one variable at a time.
- Run a small test print before committing a full plate.
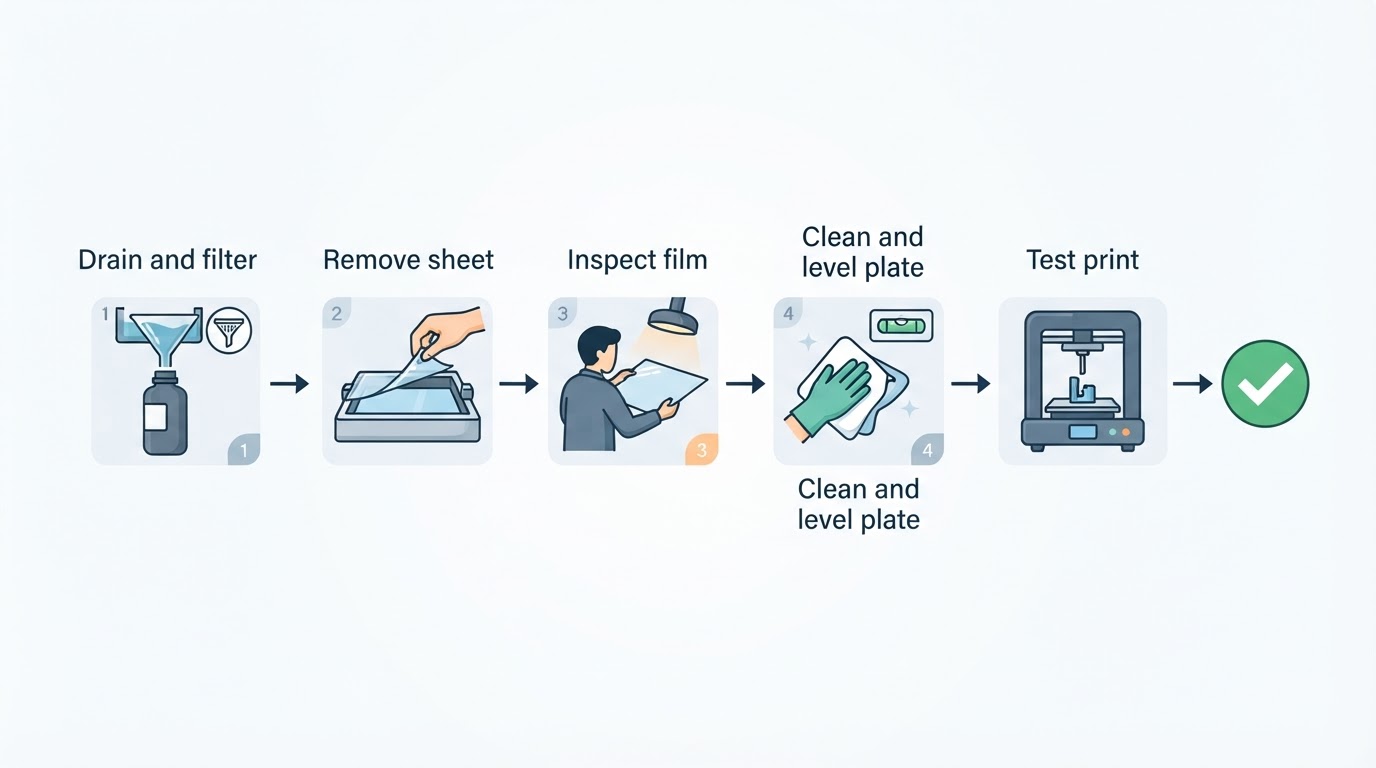
You are done when the plate holds the test part, the film comes up clean, and no cured sheet remains bonded to it. If a fresh film, warm vat, level plate, and stronger exposure still fail, review supports, hollowing, and suction, testing one change at a time.
FAQ
Can I use a metal scraper or razor blade to get a print off the FEP? No. Metal tools scratch, dent, or puncture the film, and a puncture can leak resin onto the screen. Use plastic and minimal force, or the tank-clean cycle.
How do I know whether to clean the film or replace it? Clean when the film is clear with only loose debris. Replace when it is cloudy, scratched, dented, punctured, or shows ghost outlines that survive cleaning.
Why does my print keep sticking to the FEP instead of the build plate? Possible causes include plate preparation, resin temperature, exposure, supports, suction and film wear. Clear the vat, inspect the film and use a small test print to isolate one cause at a time. For the separate wash-and-cure stage, see the site's resin-miniature curing guide.


