The short answer
For most Warhammer models, assemble first and paint second: a built miniature is stable to hold. Sub-assembly painting — building and painting a model in a few chunks, then joining them — is the exception you plan at the build stage, not a step you add by default.
Use it only when a part blocks a surface you want to paint; that part gets painted on its own and attached last.
If you are new to painting, the separate miniature-painting guide covers the basecoat and highlighting steps after assembly.
When painting before assembly pays off
Reach for sub-assemblies when a part overlaps the surface you are trying to reach:
- Heads under a hood or high collar. Once the collar is glued, the face sits in a well a brush has to fish around in.
- Shields, banners and capes over the torso. Often the most detailed part, and far easier to paint flat on a stick than angled against a chest.
- Weapons held across the chest. A rifle or two-handed weapon hides the chest detail underneath it.
- Backpacks and cloaks. They block the whole back of the torso.
- Enclosed interiors. A cockpit or open-top turret is sealed the moment you close the model up, so paint it first or not at all.
- A rider and its mount, or a large centrepiece. A few chunks keep each piece small enough to handle.
When to build it all first
Full assembly is faster, firmer to hold and has no joins to hide. Prefer it when:
- The model is rank-and-file infantry, or a simple monopose or push-fit kit with little overlap.
- You are painting an army to a tabletop standard, where consistency across a unit matters more than one hidden interior.
- The join crosses a smooth, visible panel. A seam through the middle of a thigh is hard to disguise later.
- The joint needs filling or sanding before paint.
A small decision matrix
What you are building | Assemble first? | Why it helps |
|---|---|---|
Simple infantry, monopose or push-fit | Yes | Little overlap, one solid body is easier to hold |
Head under a hood or high collar | No: paint the head separately | The collar blocks the face once glued |
Shield, banner or cape over the torso | No: paint the blocking part separately | The most detailed surface stays flat and reachable |
Weapon held across the chest | No: paint the arms and weapon separately | The chest and belt stay open to the brush |
Backpack over the back of the head | No: paint the backpack separately | The back of the torso stays visible while you work |
Vehicle with an open cockpit or interior | No: paint inside before closing it up | The interior is sealed after assembly |
Large centrepiece or monster | Partly: break it into a few chunks | Each piece stays small enough to handle |
An order of work that keeps the joints clean
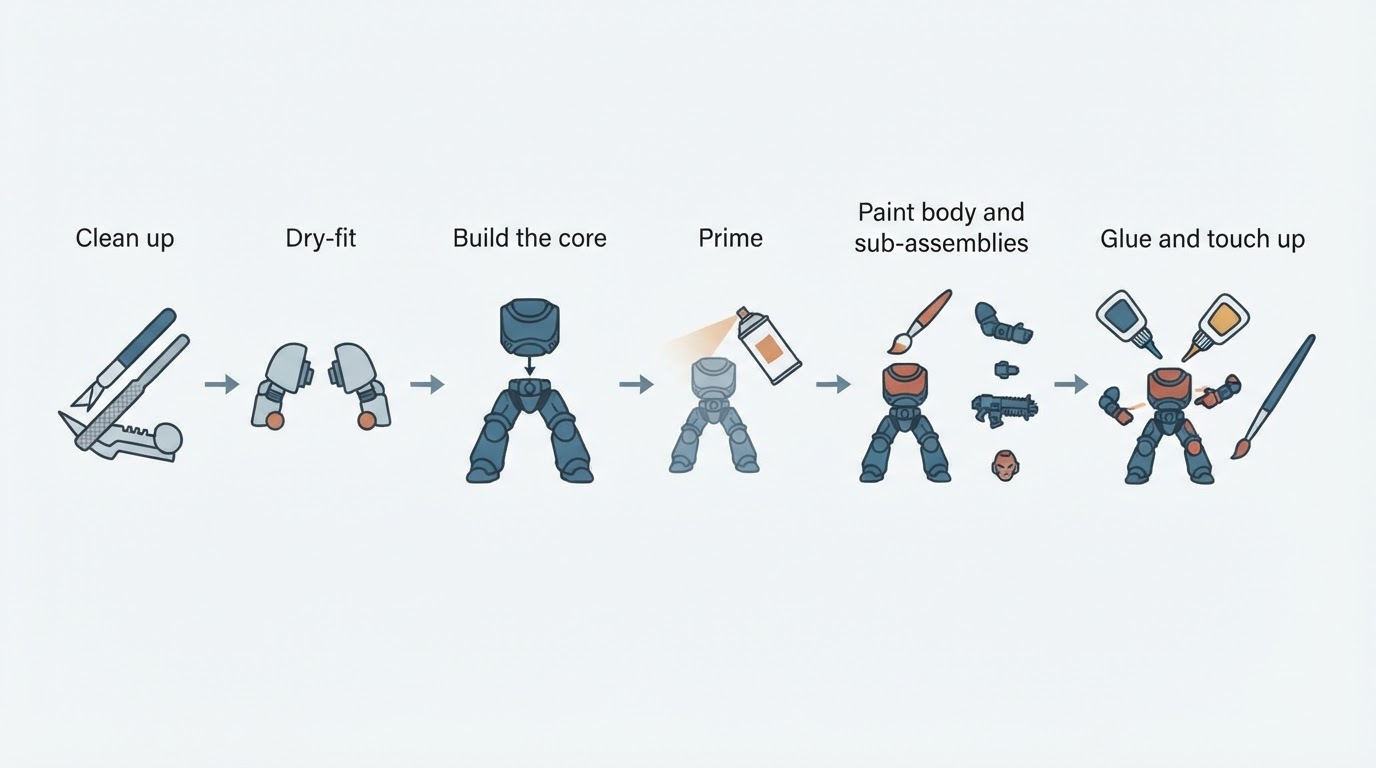
- Read the instructions and dry-fit the parts. Work out which pieces will block your brush.
- Clean each part. Clip it free with a little plastic to spare, trim the gate flush, then scrape the mould lines.
- Keep the number of sub-assemblies small. One or two extra chunks per model is usually enough.
- Build the core. Legs, torso and base go together as the body you will hold while painting.
- Test-fit the loose parts on the built core. Catch anything that will not fit once it has paint on it.
- Mount the loose parts. A cocktail stick and a little putty give you a handle that keeps your fingers off the wet paint.
- Prime the body and the loose parts in the same session, so the undercoat matches when they come together.
- Paint the body, then the sub-assemblies, to the same standard so the finish looks continuous.
- Clear the joints before gluing. Scrape or sand the paint off the mating faces so bare plastic meets bare plastic.
- Glue, then touch up the join once it has set.
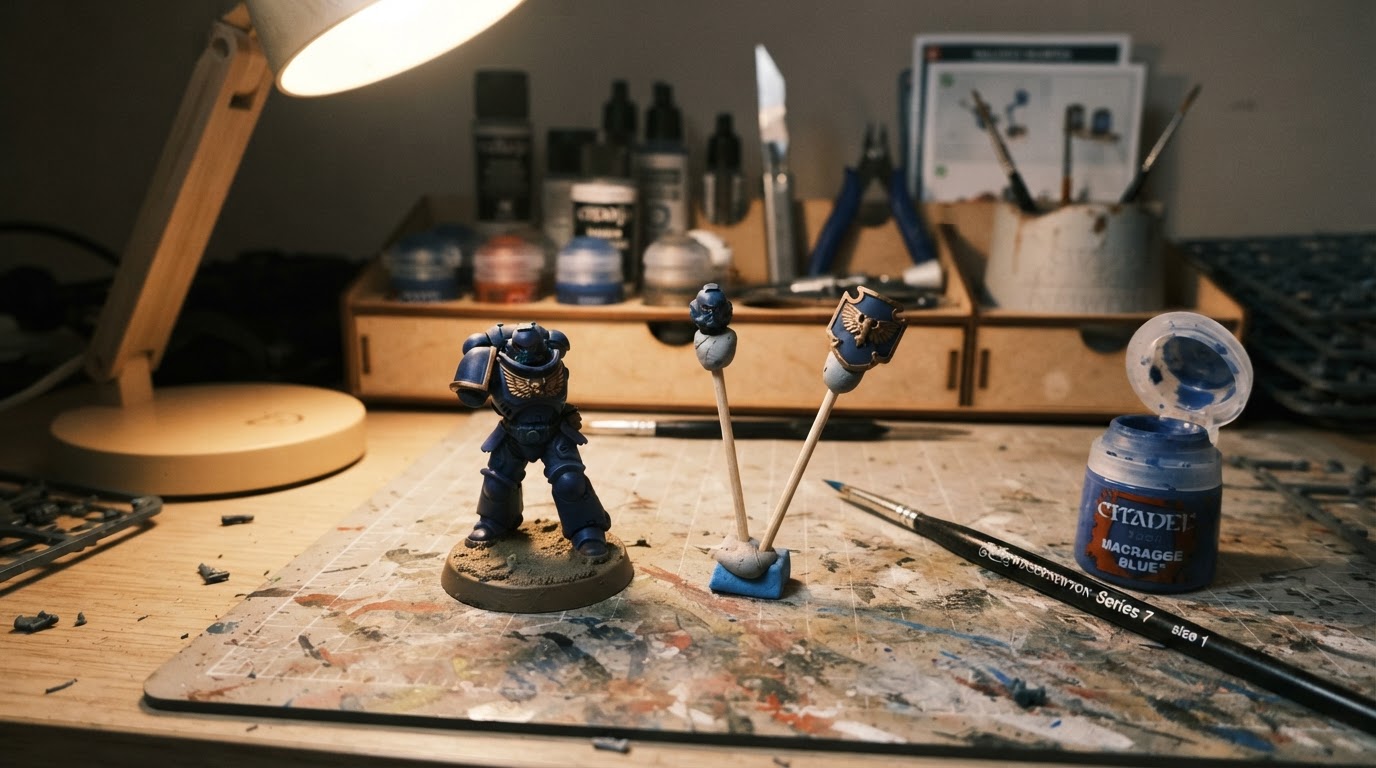
Finished when: every surface visible from a normal tabletop angle is painted, the joints sit flush, and the model can be picked up without a part shifting.
Why plastic glue changes the order
Plastic cement is a solvent weld, not a gap-filling adhesive: it softens the polystyrene on both mating faces so they fuse into one piece. Three consequences for your build order:
- The faces need bare, clean plastic. Primer, paint or mould release between them stops the weld forming.
- A little is enough. Overloading pushes softened plastic out of the seam onto painted areas nearby.
- Match the glue to the material. Plastic cement for polystyrene kits; super glue for resin, metal or mixed-material joins.
Follow the instructions on the product you own. If you paint first and glue later, clear a small patch at the joint; where scraping a painted joint is impractical, super glue holds better than cement but does not replace a clean plastic contact point.
What sub-assembly painting costs you
- Handling risk. Every loose part is one you can drop or lose under the desk.
- Visible joins. A join that crosses detail is harder to disguise.
- Unfinished hidden areas. It is easy to assume a face is finished because you cannot see it.
- Extra time. Several pieces take longer to prime and touch up; it pays off on a centrepiece, not across a forty-model unit.
For the official version of this workflow, including sub-assembly examples for its own kits, the Warhammer hobby guidance PDF is the reference to keep open next to your instructions.
FAQ
Do you paint Warhammer models before or after assembly?
Most models are painted after assembly: build the whole figure, then paint. Paint before assembly only for parts that block a surface you want to see — a shield across the torso, a head in a high collar, or the inside of a vehicle. Treat it as a planned exception.
Can you glue parts after painting them?
Yes, if the joint is prepared. Scrape or sand the paint off the mating faces so the cement reaches bare polystyrene, then apply a small amount and hold the parts together. Paint trapped in the joint weakens the bond, so touch up the seam afterwards.
Should you prime before or after assembly?
Prime once the build plan is settled, and prime the body and loose parts in the same session so the undercoat matches. If a part will be glued later, mask the joint or scrape the primer back to bare plastic first.


