What Changes When Contrast Goes Over Metal
A metallic basecoat is a reflective surface under a translucent paint. Contrast dries darker in recesses and lighter on raised areas, and Games Workshop notes it suits textured surfaces better than large flat panels. Over smooth metal there are no pale recesses to darken, so the metal supplies the brightness and the paint acts as a colored filter. The result is a tinted metal — useful for colored armor, weapon glows and verdigris — rather than the two-tone shading you get over a light primer.
Games Workshop is direct that this is a supported technique: Contrast paints "work wonders applied over standard metallic paints in many different combinations" (Warhammer Community). The same article suggests thinning Basilicanum Grey a little with Contrast Medium for clean, polished armor, Ratling Grime for the patina of age on working metals, and Akhelian Green or Aethermatic Blue over Runelord Brass or Retributor Armour. Less saturated Contrasts give "a really nice metallic sheen" over a metal such as Leadbelcher.
A Warhammer Community tutorial shows the idea in a full scheme: painter Tyler Mengel sprays a Space Marine with Retributor Armour, touches up missed areas, then applies Blood Angels Red and Iyanden Yellow over that gold basecoat for metallic quartered armor (Warhammer Community tutorial). Two lessons carry over: the basecoat must be even, and contrast paint over metallic goes on one segment at a time so it does not dry before it is spread.
Why The Same Pot Looks Different On Every Model
The variables are the metal, the basecoat, the paint and your brush:
- The metal underneath. Silver, gold, bronze and dark iron give the same pot a different apparent color.
- Basecoat quality. A thin or patchy spray reads as blotches once tinted.
- Pigment strength. A weak color over metal may almost disappear while a strong one dominates.
- Dilution. Contrast Medium keeps the flow behavior; too much turns the layer into a faint wash.
- Loading and rework. Going back over a partly dried area moves pigment and leaves streaks.
A product photo cannot predict any of this, which is why you test small.
Test On A Spare Piece Before You Commit
- Pick a spare. Use an extra model, a leftover bit, or a base that takes the same primer and metal.
- Match the basecoat exactly. Prime and paint it the same way, with the same metal coats, and let it dry fully.
- Divide it into zones. Mark a control area you leave as bare metal and two or three variant zones: one coat, two coats, and one thinned with Contrast Medium.
- Apply in single passes. Load the brush, spread the paint quickly, and wick pools away from flat areas with a clean, barely damp brush instead of adding more paint.
- Let it dry completely. Do not judge the color while wet, and do not handle or varnish it early.
- Compare under your usual light. Check both under the lamp or daylight you actually paint in, then record which zone you would accept.
Done when: you can point at one zone on the spare and say you would repeat that exact recipe on the model.
Diagnostic Matrix
What you see | Likely cause | What to change |
|---|---|---|
Dull, weak tint | Metal too dark, or the Contrast has low tinting strength | Start from a brighter metal, or use a stronger color |
Color much darker than the pot | Dark metal under a translucent layer | Brighten the basecoat or thin the Contrast with medium |
Blotches and tide marks | Excess paint, or reworking an area that was already drying | Make one clean pass, wick the pools, leave the edge alone |
Almost no shading in recesses | Smooth metal does not pool like a textured surface | Treat it as a tint and add a separate wash for shadow |
Sheen looks flat | Heavy application, or a matte finish on top | Thin the layer, and test the finish on the spare first |
Patchy primer showing through | Uneven spray or missed spots | Touch up the metal and retest before tinting the model |
Drying And Varnish Caveats
Let each layer dry fully before you handle the model or add anything over it. Humidity and temperature change how long that takes, and a tacky layer can be disturbed by a brush, a finger or a varnish pass.
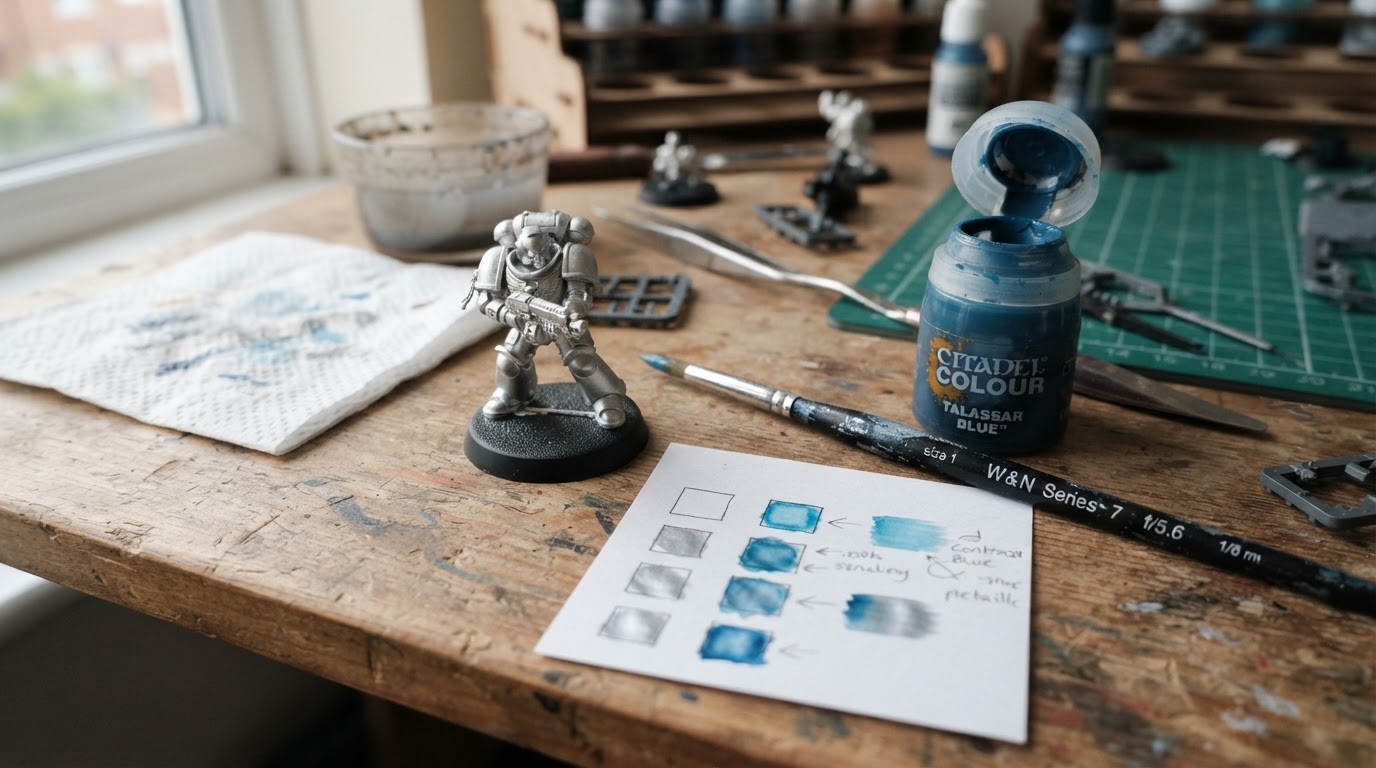
Thin with Contrast Medium rather than water when you want the paint to keep flowing as it does straight from the pot; water can change how the layer spreads and how evenly it dries.
Varnish is the step most likely to change the result. A gloss finish keeps a wet, reflective look and tends to preserve the metallic sheen; a matte finish scatters light and usually reads much flatter. Put the same varnish on the test piece first, at the same thickness, before sealing a model, and follow the label for drying and ventilation.
Limitations
- No result can be promised as an exact match to a photo; the metal, primer, thickness and light all shift it.
- This is a tint, not automatic shading; large flat panels and vehicle hulls still need separate shading.
- Colors and formulas differ between brands and ranges, so a recipe from one paint line does not transfer unchanged.
- A dark metallic base may make a translucent tint less obvious; a bright reflective base can change how that tint appears under different light.
FAQ
Can you paint Contrast over any metallic paint?
It is a reasonable experiment over a fully dried, compatible metallic basecoat, but paint chemistry, brightness and surface finish matter. Games Workshop's examples use Leadbelcher, Runelord Brass and Retributor Armour; test the exact products your model uses. For a different comparison, see our Contrast versus Speedpaint guide.
Should you thin Contrast with water or Contrast Medium?
Contrast Medium keeps the paint's flow behavior; Warhammer Community suggests it for thinning colors over metal, such as a little medium with Basilicanum Grey for polished armor. Water changes how the layer spreads, so compare both on the spare.
Does varnish change the effect?
Yes. Gloss keeps a wet, reflective look; matte can dull the metallic sheen noticeably. Test your varnish on the same piece first.


